Saturday 28 April 2007

Bush craft

This is an attempt at creating a more realistic looking bush. The ones we have so far look like marshmallow on sticks. We also realised that the environments were looking rather lifeless and baron. To liven the scenes up and add some texture to the environments, I'm adding billions of leaves to the trees and bushes.

Below is an incomplete bald bush test:

Tree research


Wednesday 25 April 2007

Opening shot

I started to re-model the opening shot in greater detail from the blockout version. A path will run through the fields and lead the viewer towards the hill in the distance. Lots more detail will be added to bring the scene to life, such as small buildings in the distance, hedge rows and trees. At the moment I'm gnarling up the wood that makes up the stile.


Textured bench

A coloured bench:

Tuesday 24 April 2007

Textured tractor

Here is the newly textured tractor. Most of the tractor was UV mapped; some parts I just applied coloured Lamberts. The model will be small when in the film, so it doesn't require much detail.


The UV map:


Painting the UV map in Photoshop:


I based the colours on this fine looking tractor below:


Monday 23 April 2007

More props

Today I've been modeling more props for the film as shown below-


The bench that Monster Mum sits on at the top of the hill:


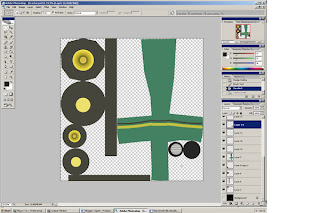
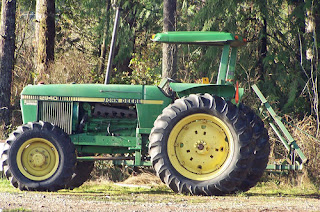
The tractor that Monster Kid picks up from a field. This still needs more detail adding to it and I will probably change the cabin section, making it less square:


Below is the improved tractor. More detail might be added to the wheels:

The tree that Monster Kid picks up. I'm happy with branches, but some of the foliage may change shape later on:


Friday 20 April 2007

Monster mum blendshapes

Here are some Monster Mum blendshapes. The mum character has fewer expressions than Monster Kid, but are just as hard to make because of the round shaped head. Trying to maintain the curve of the mouth geometry and keep it free of any lumps and bumps required lots of tweaking of the vertices.


Saturday 14 April 2007

Monster kid look development

It's my job over the weekend to play around with the look development of Monster Kid. Jim wants everything to look like plasticine, as though you could reach in and pick the objects from the screen. I don't think we're far from this look already, and believe it's just a case of tweaking the global illumination and light settings. We're also going to look into Maya 8's sub-surface scattering options to see what effects we can come up with.

This is the standard global illumination look that we've been using so far..quite nice, but not plasticine enough!


Test #01

Global pass:

Shadow pass:

Colour pass:

Compositing the layers in After Effects:


(Above) Global layer - opacity 24%, brightness -5%, contrast -7%
Shadow layer - opacity 100%, brightness 100%, contrast -22%


Production Gannt chart

Blockout assesment notes

Notes from the tutors:

- Issues with the composition of the sun when the child takes it from the sky.

-How are we going to play with lighting effects when the sun is removed from the sky?

-How are we going to communicate the child's interaction with the objects he picks up. Scale and perspective issues?

-Can we reproduce the original 2D style in 3D?

-Look at 1930's and 40's agricultural posters to help with the look of the film.

Thursday 5 April 2007

Konnichi wa

An anime Monster Kid!

Wednesday 4 April 2007

More blockout

I have passed on the scaled blockout environments to Jim. I also made a simplified version of Monster Kid allowing for easier animation of the blockout.

Tuesday 3 April 2007

Texturing the city


I've begun the glorious task of texturing the city. I'm finding that I can get away with assigning plain materials to some objects, like all of the girders and cranes. The buildings and other small details are going to be UV mapped. It's going to take quite a while!